Creaking, groaning floorboards under your feet can quickly ruin the quiet comfort of your home. Whether a loud creak wakes family members at night or annoys you in the hallway, loose boards need attention. When you learn how to fix a squeaky floor, you restore peace to your living space. In fact, you also protect your finished flooring from long-term wear. Based on wood science research from the National Wood Flooring Association (NWFA), floor squeaks occur when subfloor panels rub against loose framing nails or adjacent wood boards. As a result, walking across the room creates annoying friction noises.
In Ventura County, shifting seasonal weather makes floor squeaks very common. For example, beach towns like Ventura and Oxnard see damp ocean air and morning fog. That high humidity causes wood subfloors to take in moisture and swell. Meanwhile, inland areas like Camarillo and Thousand Oaks experience hot, dry Santa Ana winds. These dry spells suck moisture out of the wood, causing floor joists to shrink. Therefore, original construction nails pull loose from the wood framing over time, creating gaps that squeak with every step.
Fortunately, learning how to fix a squeaky floor is an easy DIY project that takes only an afternoon. By using modern snap-off screws or simple wood shims, you can silence squeaks through carpet, hardwood, or from a crawlspace below. This complete guide shows you how to fix a squeaky floor so you can walk through your home in complete silence.
Project Overview: Fixing a Squeaky Floor
-
Skill Level: Beginner to Intermediate
-
Estimated Time: 1 to 2 hours
-
Average DIY Cost: $15 – $35 for specialized floor repair screws or shims
-
Estimated DIY Savings: $150 – $300 compared to a flooring service call
Tools and Materials Needed to Fix a Squeaky Floor
Getting your tools together first will make the job fast and simple. In addition, using the right screws keeps your carpet and hardwood safe.
Essential Tools
-
Cordless drill and driver bit: Drives specialty screws smoothly into solid wood joists.
-
Deep-scan stud finder: Locates the solid wood floor joists hidden beneath your subfloor.
-
Small hammer and nail set punch: Taps screws or shims into place without marring the floor.
-
Flexible putty knife: Smooths color-matched wood putty over tiny screw holes in hardwood.
-
Clean microfiber cloth: Wipes away excess wood dust and putty residue.
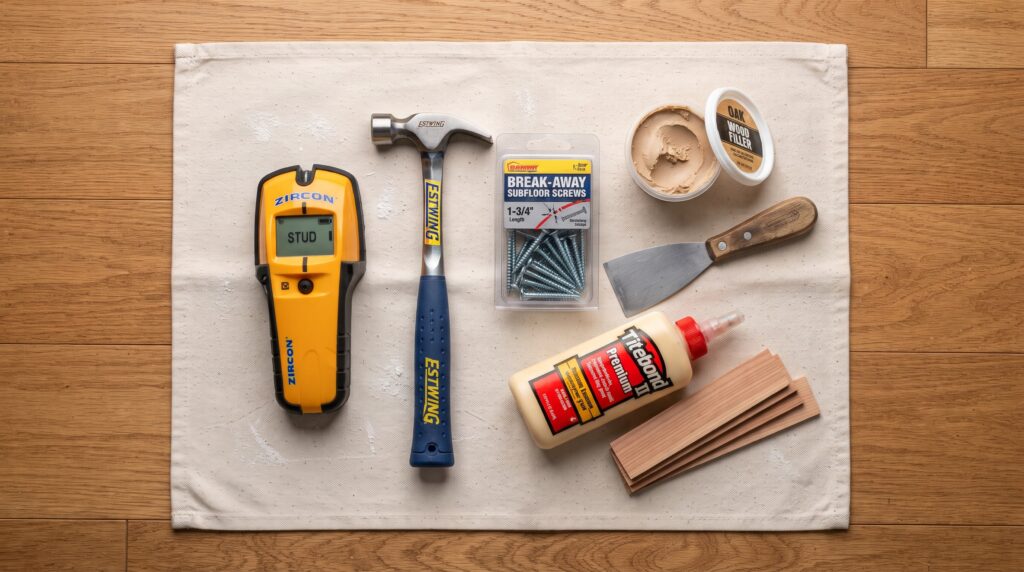
Recommended Materials
-
Specialized snap-off floor repair screws: Feature scored heads that snap off cleanly below carpet pile or hardwood surfaces.
-
Thin wood shims and carpenter’s wood glue: Fills gaps between joists and subfloors from a crawlspace.
-
Color-matched wood filler: Hides tiny screw holes on finished hardwood floors.
-
Painter’s tape: Marks squeak spots and joist lines on your floor.
Safety Precautions Before You Fix a Squeaky Floor
Always observe basic safety habits before drilling into household floors:
-
Check for pipes and wires below: In two-story homes or over crawlspaces, electrical cables and plumbing pipes often run through floor joists. Therefore, verify where utility lines run before driving long screws.
-
Wear safety glasses: Driving screws into dense subfloor lumber can throw wood chips. For this reason, always wear safety glasses.
-
Follow wood construction standards: Fasten subfloors securely to framing joists, following guidelines from the Forest Products Laboratory (USDA Forest Service).
Why Wood Floors and Subfloors Squeak
Understanding what causes floor squeaks helps you pick the best fix:
-
Loose Subfloor Nails: Builders often nail plywood subfloors to floor joists. Over time, wood shrinks and nails loosen. When you step on the floor, the plywood slides up and down on the smooth nail shank, creating a loud squeak.
-
Gaps Between Joists and Subfloor: Warped joists can leave small gaps beneath the subfloor. As a result, the plywood flexes downward under foot traffic until it hits the joist.
-
Hardwood Planks Rubbing Together: Dry weather causes solid tongue-and-groove hardwood boards to shrink. Consequently, the board edges rub together when walked on.
Step-by-Step Guide: How to Fix a Squeaky Floor
Step 1: Pinpoint the Exact Squeak Location
First, find the precise point where the floor creaks:
-
Walk slowly across the room in your socks to find the loudest creak.
-
Shift your weight from heel to toe to locate the moving board.
-
Next, place a piece of blue painter’s tape on the floor right over the loudest spot.
-
Have a helper step on the spot while you watch closely. Look for any visible dipping in the flooring.
Step 2: Locate the Floor Joists Below
Securing your subfloor requires anchoring into solid wood joists:
-
Most floor joists run spaced 16 inches apart from center to center.
-
Run your electronic stud finder across the floor to detect the joist edges.
-
Tap the floor lightly with your knuckle or a small rubber mallet. The sound will change from hollow to a dull, solid thud when you hit a joist.
-
Mark the joist line with painter’s tape across the squeak zone.
Step 3: Fix a Squeaky Floor Through Carpet
You can silence creaks under carpet without cutting or tearing the fabric:
-
Use a specialized carpet floor repair kit with scored snap-off screws.
-
Place the plastic alignment tripod over the marked joist right above the squeak.
-
Drive the specialty scored screw down through the carpet and subfloor into the wood joist.
-
The screw pulls the subfloor tight against the framing joist.
-
Next, slip the removal tool over the protruding screw head and rock it sideways.
-
The screw snaps off cleanly below the carpet backing. As a result, the screw head stays hidden, leaving your carpet completely undamaged.
Step 4: Fix a Squeaky Floor Through Hardwood
You can also silence creaks on exposed hardwood floors with minimal visual impact:
-
Drill a tiny 3/32-inch pilot hole through the hardwood and subfloor into the joist below. Pre-drilling prevents dense hardwood planks from splitting.
-
Drive a counter-sinking trim screw or scored hardwood screw into the hole.
-
Stop drilling when the screw head sinks roughly 1/8-inch below the wood surface.
-
Next, fill the tiny hole with color-matched wood putty using your flexible putty knife.
-
Wipe the area with a damp cloth. Once the putty dries, the tiny screw hole blends into the natural wood grain.
Step 5: Fix a Squeaky Floor from a Crawlspace
If you have access beneath the room in a crawlspace or basement, you can fix squeaks without touching the finished floor:
-
Have a helper walk on the floor above while you watch the subfloor from below with a flashlight.
-
Watch for subfloor movement against the top edge of the joists.
-
Coat a thin wooden shim with carpenter’s wood glue.
-
Slide the glued shim gently into the gap between the joist and the subfloor.
-
Push the shim in by hand or tap it lightly with a hammer. Do not drive the shim too hard, because forcing it can raise the floor above.
-
The glued shim fills the void, stopping all vertical movement and creaking.
Step 6: Test the Floor and Clean Up
Finally, verify that your repair silenced the floor:
-
Walk firmly over the repaired area several times.
-
The floor should feel solid and remain completely quiet.
-
If a small creak remains nearby, drive a second screw three inches away along the same joist.
-
Remove your painter’s tape and vacuum up any loose wood dust.
Common Mistakes When You Fix a Squeaky Floor
Avoid these common DIY errors to keep your floors quiet and intact:
-
Driving screws into hollow spaces: Screws only hold when driven into solid joists. Screws driven into thin subfloors without hitting a joist will pull loose quickly.
-
Forcing shims too far: Driving wooden shims with heavy hammer blows lifts the subfloor. As a result, this creates an unsightly hump in your finished floor. Always insert shims gently.
-
Using standard drywall screws: Drywall screws are brittle and snap easily under foot weight. Always use hardened floor screws or specialized snap-off screws.
-
Skipping pilot holes in hardwood: Driving screws directly into solid oak or maple splits the wood grain. Always pre-drill pilot holes first.
Ventura County Climate Tips for Wood Floor Care
Our local weather patterns call for steady indoor care:
-
Ventura and Oxnard (Managing Coastal Humidity): Damp ocean air increases indoor humidity, causing hardwood planks to expand during foggy summer months. Use a home dehumidifier or run your ceiling fan to keep indoor humidity levels between 35% and 55%.
-
Camarillo and Thousand Oaks (Managing Santa Ana Dryness): Dry autumn winds shrink wood boards quickly, opening gaps between planks. Keep your home closed during dry windstorms to prevent rapid moisture loss in your subfloor framing.
When to Call a Professional to Fix a Squeaky Floor
While most squeaks are simple DIY jobs, some floor problems need skilled trade help:
-
Widespread bouncing across the room, which points to sagging or undersized floor joists.
-
Subfloor water damage or soft, spongy wood caused by plumbing leaks near bathrooms or kitchens.
-
Termite damage or dry rot weakening floor framing members in older crawlspaces.
If your floors need structural joist repair, your hardwood needs board replacement, or you want a pro to handle your home maintenance checklist, Paul Franc Handyman Services is ready to assist. Proudly serving homeowners, landlords, and commercial spaces throughout Ventura, Oxnard, Camarillo, Thousand Oaks, and surrounding Ventura County communities, we provide dependable, quality home repairs done right the first time. Visit paulfranc.com to request an estimate or schedule your service today.