Popping, knocking, and rumbling noises from your garage water heater indicate that your tank is crying out for care. Over time, loose minerals settle at the bottom of the tank, forming a thick crust over the heating burners. When you learn how to flush a water heater, you clear out that mineral sludge and restore heating speed. According to home energy studies from the U.S. Department of Energy (Energy.gov), mineral scale buildup reduces water heating efficiency by up to 15%. As a result, your water heater burns more gas or electricity just to keep your shower warm.
In Ventura County, water heater maintenance is especially urgent. Tap water across Ventura, Oxnard, Camarillo, and Thousand Oaks carries high mineral hardness. Dissolved calcium and lime scale precipitate out of the water every time the burner fires. Therefore, an unserviced water heater can collect two to four inches of rock-like sediment inside the tank every single year. That thick sediment layer traps intense heat against the bottom steel tank floor, which causes premature metal fatigue and tank leaks.
Fortunately, taking the time to flush a water heater is a straightforward weekend chore that takes under an hour. In fact, a simple garden hose and a screwdriver are all you need to clear the tank. This complete guide provides clear, practical steps so you can flush a water heater safely and keep your hot water flowing freely.
Project Overview: Flushing a Water Heater
-
Skill Level: Beginner to Intermediate
-
Estimated Time: 45 to 60 minutes
-
Average DIY Cost: $0 – $15 (using an existing garden hose or buying a brass cap)
-
Estimated DIY Savings: $150 – $250 compared to a plumbing service call
Tools and Materials Needed to Flush a Water Heater
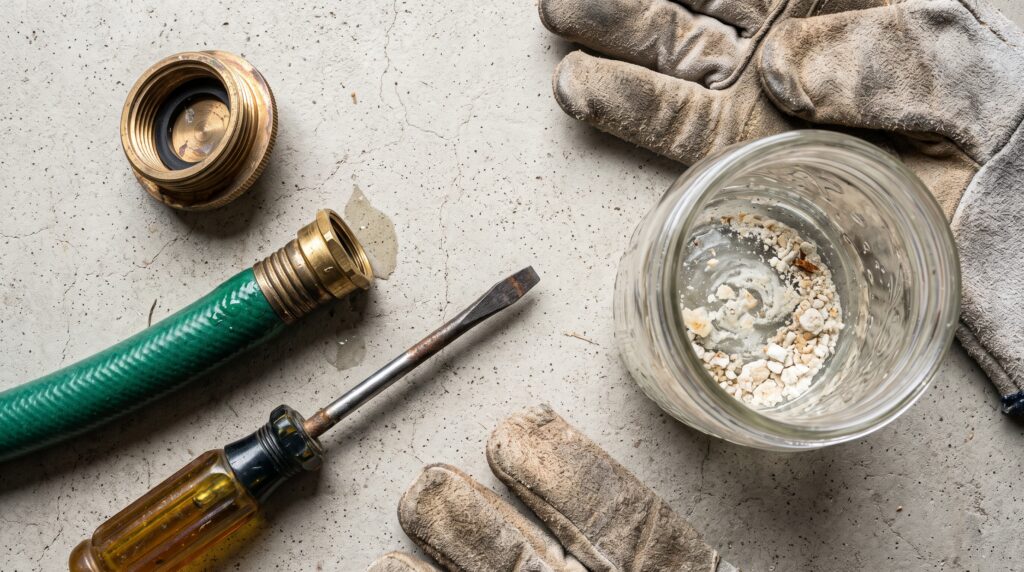
Gathering your tools ahead of time ensures you can drain hot water safely without making a mess.
Essential Tools
-
Heavy-duty garden hose: Must withstand hot water without softening or kinking.
-
Flathead screwdriver: Used to open and close standard slotted drain valves.
-
Channel-lock pliers or adjustable wrench: For tightening the hose fitting or freeing stubborn drain valves.
-
Clear glass jar or shallow white bucket: Catches the initial drain flow so you can inspect sediment buildup.
-
Heavy heat-resistant work gloves: Protects your hands from scalding water and hot brass fittings.
Recommended Materials
-
Threaded brass hose cap with rubber washer: Screws onto the drain valve after the flush to prevent slow drips.
-
Old towels or rags: Cleans up minor drips around the drain valve.
Safety Precautions Before You Flush a Water Heater
Working with high-temperature water and fuel sources demands strict attention to safety:
-
Always turn off the heat source first: Never drain a water heater while the gas burner or electric heating elements are on. In fact, running electric heating elements in an empty tank burns them out in less than 30 seconds.
-
Beware of scalding water: Water inside the tank can exceed 125 degrees. For this reason, always wear heavy gloves and direct the hose away from plants, pets, and children.
-
Follow safe plumbing codes: Ensure your pressure relief valve pipe and drain lines meet local standards from the International Association of Plumbing and Mechanical Officials (IAPMO).
Why Hard Water Makes Tank Flushing Essential
Understanding what happens inside your tank helps you see why annual maintenance matters:
-
Saves Energy and Lowers Utility Bills: A heavy blanket of calcium acts like an insulating barrier between the burner flame and the water. Therefore, clearing sediment lets heat transfer directly into the water, cutting your energy bills.
-
Stops Annoying Tank Noises: That loud popping sound is steam bubbling up through trapped mineral crust. Once you flush a water heater, the tank operates quietly again.
-
Prevents Premature Tank Rupture: Excess bottom sediment creates hot spots on the steel tank lining. Over time, these hot spots crack the inner glass lining, resulting in costly tank leaks.
Step-by-Step Guide: How to Flush a Water Heater
Step 1: Turn Off the Heating Source Safely
First, isolate the heat source to keep your equipment safe:
-
For Gas Water Heaters: Turn the gas control valve knob near the bottom of the tank from “ON” to the “PILOT” setting. This keeps the pilot light lit without firing the main burner.
-
For Electric Water Heaters: Head to your home electrical breaker panel. Flip the dedicated 30-amp two-pole breaker controlling the water heater to the “OFF” position.
-
Confirm that the tank has stopped heating before proceeding to the next step.
Step 2: Connect a Garden Hose to the Drain Valve
Next, prepare your drainage route:
-
Locate the drain valve near the bottom base of the tank.
-
Thread your garden hose tightly onto the threaded drain valve spout by hand.
-
Run the other end of the garden hose downhill to a safe drainage spot, such as your driveway, a street storm drain, or a floor drain.
-
Keep the hose line as straight as possible to maintain strong drainage flow.
Step 3: Open a Hot Water Tap to Break the Vacuum
Creating an air vent allows the tank to drain quickly without pulling a vacuum:
-
Go inside your home to the nearest upstairs bathroom or kitchen sink.
-
Turn on the hot water faucet completely.
-
Leaving this faucet open breaks the internal vacuum inside the plumbing lines, allowing water to drain smoothly out of the bottom hose.
Step 4: Open the Drain Valve and Flush Sediment Out
Now begin draining the mineral sludge:
-
Place your clear glass jar under the hose outlet to catch the first stream of water.
-
Use your flathead screwdriver to turn the drain valve screw counterclockwise.
-
Watch the water flow through your glass jar. You will see cloudy water, white calcium pellets, and dark flakes pouring out.
-
Let the tank drain until the water runs completely clear. This usually takes 15 to 25 minutes.
Step 5: Perform the Cold Water Power Flush
Stirring up settled sediment at the bottom of the tank clears out stubborn scale:
-
Keep the bottom drain valve open with the hose discharging water outside.
-
Turn on the cold water supply valve at the top of the tank for one minute.
-
The burst of pressurized cold water stirs up resting calcium chunks from the tank floor and sweeps them out through the hose.
-
Turn off the cold water valve and wait for the hose to run clear.
-
Repeat this quick power flush two or three times until zero mineral grit comes out of the hose.
Step 6: Close the Drain, Refill the Tank, and Restore Power
Finally, restore your water heater to normal service:
-
Close the bottom drain valve tightly with your screwdriver and disconnect the garden hose.
-
Screw a threaded brass hose cap with a rubber washer onto the drain valve spout as an extra guard against drips.
-
Turn the cold water supply valve at the top of the tank fully open.
-
Return to your open indoor sink. When water flows steadily from the hot tap without sputtering air, the tank is 100% full.
-
Turn off the indoor sink faucet.
-
For Gas Units: Turn the control knob back to “ON” and set your desired temperature (120 degrees is ideal).
-
For Electric Units: Flip the circuit breaker back to “ON” at your electrical panel.
Common Mistakes When You Flush a Water Heater
Avoid these frequent DIY errors to keep your water heater running smoothly:
-
Restoring electric power to an empty tank: Turning on electric breakers before the tank is completely full burns out the heating elements instantly. Always verify steady water flow from an indoor faucet before restoring power.
-
Using a flimsy garden hose: Hot water softens cheap hoses, causing them to collapse or melt. Always choose a heavy-duty, commercial-grade garden hose.
-
Forcing a stuck plastic drain valve: Many builder-grade water heaters feature cheap plastic drain valves that can snap under heavy wrench force. Turn valves gently by hand or with light screwdriver pressure.
-
Running the hose uphill: Gravity powers tank drainage. If your garden hose runs uphill, water will stop flowing and sediment will settle back into the tank.
Ventura County Hard Water and Water Heater Maintenance Tips
Our regional water conditions call for proactive home upkeep:
-
Ventura and Oxnard (High Mineral Hardness): Groundwater blends in coastal zones carry high dissolved calcium levels. Flush your water heater every 6 to 12 months to prevent rock scale from cementing over the lower drain valve.
-
Camarillo and Thousand Oaks (Managing Conejo Valley Lime Scale): Water in eastern Ventura County carries high mineral density. Inspect your water heater’s sacrificial anode rod every three years. Replacing a depleted anode rod prevents hard water from eating through your steel tank walls.
When to Call a Professional to Flush a Water Heater
While annual tank flushing is a simple DIY project, certain plumbing conditions need skilled trade help:
-
An old water heater that has not been flushed in over 8 years, where clearing heavy sediment might expose existing bottom tank leaks.
-
A broken or stripped drain valve that refuses to open or leaks continuously after the flush.
-
A leaking temperature and pressure (T&P) safety relief valve that drips water down the side of the tank.
If your water heater needs repairs, your drain valve is leaking, or you want an experienced tradesman to handle your home maintenance checklist, Paul Franc Handyman Services is ready to assist. Proudly serving homeowners, landlords, and commercial spaces throughout Ventura, Oxnard, Camarillo, Thousand Oaks, and surrounding Ventura County communities, we provide dependable, quality home repairs done right the first time. Visit paulfranc.com to request an estimate or schedule your service today.