Exterior stucco gives California homes great charm and strong fire protection. However, stucco is very hard and stiff. Because soil shifts and walls settle, your home will soon show small wall cracks. When you learn how to repair stucco cracks, you keep your house looking great. In fact, you also stop rain from getting behind your siding. Based on building care rules from the U.S. General Services Administration (GSA), open wall gaps let wind and rain reach wood wall studs. As a result, that trapped water causes wood rot and mold inside your walls.
In Ventura County, your home faces tough local weather. For instance, beach towns like Ventura and Oxnard see thick morning fog and salty air. That wet air gets into open cracks and rusts the metal mesh wire behind the plaster. Therefore, the rusty wire breaks and pushes large chunks of stucco right off the wall. Meanwhile, inland areas like Camarillo and Thousand Oaks face very hot days and chilly nights. Because these quick heat shifts make walls expand and shrink, small spiderweb cracks form on sunny walls.
Fortunately, you can repair stucco cracks over a single weekend. By using flexible textured sealants, you can fix wall gaps up to 1/4-inch wide on your own. This complete guide shows you how to repair stucco cracks so your home stays dry and safe.
Project Overview: Repairing Stucco Cracks
-
Skill Level: Beginner to Intermediate
-
Estimated Time: 2 to 3 hours of work
-
Average DIY Cost: $20 – $45 for sealant, primer, and hand tools
-
Estimated DIY Savings: $200 – $450 compared to a trade service call
Tools and Materials Needed to Repair Stucco Cracks
Getting your tools together first will save you trips to the store. In addition, using the right tools helps your patch blend into the wall.
Essential Tools
-
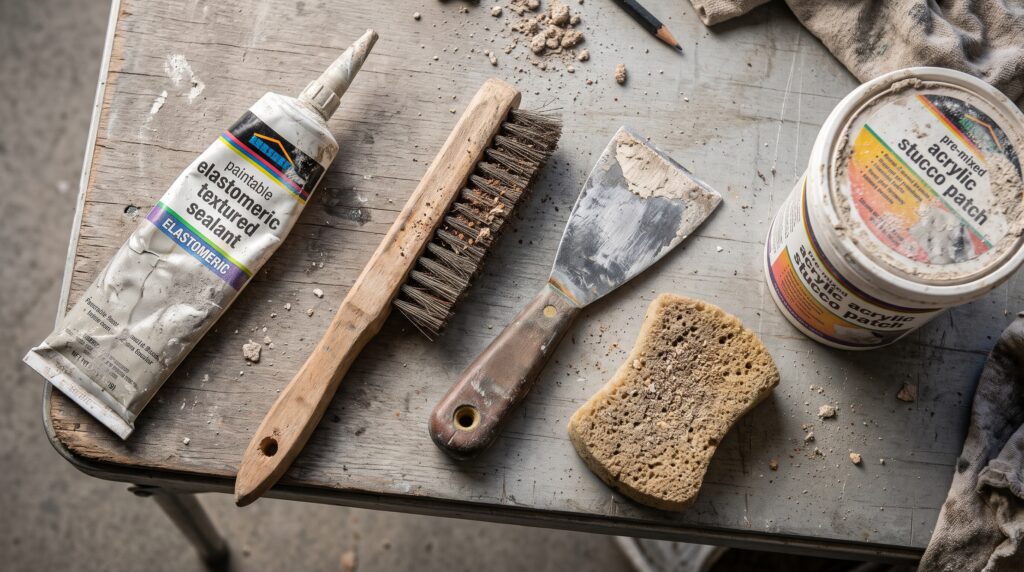
Pointed scraper or small chisel: Cuts narrow hairline cracks into clean V-grooves.
-
Stiff wire brush and nylon brush: Cleans away loose sand, dust, and peeling paint.
-
Smooth caulk gun: Pushes sealant out of the tube with steady hand force.
-
Flexible 2-inch and 3-inch putty knives: Smooths the wet patch flat with the wall.
-
Coarse texture sponge: Blends wet patch material with the rough sand wall finish.
-
Shop vacuum or leaf blower: Clears loose sand dust out of the open groove.
Recommended Materials
-
Textured flexible acrylic stucco caulk: Stretches when the house moves so cracks do not reopen.
-
Pre-mixed acrylic exterior stucco patch: Fills wider gaps up to 1/4-inch wide.
-
Exterior wall primer: Seals dry patches so your finish paint looks even.
-
100% acrylic exterior latex paint: Matches the current color of your home.
Safety Precautions Before You Repair Stucco Cracks
Always protect yourself before chipping away hard plaster:
-
Protect your eyes and lungs: Scraping hard stucco sends sharp chips and fine dust into the air. Therefore, always wear safety glasses and a dust mask.
-
Wear tough work gloves: Rough wall surfaces will scrape bare skin. For this reason, wear leather or coated work gloves.
-
Set your ladder on level ground: If you work on high walls, place your ladder on flat, hard dirt. In addition, follow ladder safety rules from the Portland Cement Association (PCA).
Understanding Why Exterior Stucco Cracks Develop
Finding the cause of each crack helps you pick the right fix:
-
Hairline Cracks (Under 1/16-inch): These thin lines show up as cement cures and dries out. However, you can seal them quickly with flexible textured caulk.
-
Corner Cracks (1/16-inch to 1/4-inch): These lines often show up near window corners due to normal house settling. Thus, you must carve a clean groove and fill it with flexible sealant.
-
Wide Cracks (Over 1/4-inch): These big gaps usually mean the house has settled unevenly. If the wall sounds hollow when you tap it, the wire mesh has broken. As a result, you will need a pro to replace the metal lath.
Step-by-Step Guide: How to Repair Stucco Cracks
Step 1: Inspect the Wall and Clean the Crack
First, remove all loose dirt and peeling paint:
-
Check the full length of the crack. Tap the wall gently with your wooden putty knife handle. If the wall feels firm, you can start your fix.
-
Next, scrub the crack with your wire brush to knock away loose sand and loose paint.
-
Then, rinse the seam with a hose or wipe it down with a wet sponge.
-
Finally, let the wall dry out fully. Caulk will not stick to wet cement.
Step 2: Widen the Gap to a Clean V-Groove
Never wipe caulk over a tight, raw hairline crack:
-
Put the tip of your scraper or chisel inside the crack line.
-
Pull the tool down the crack with steady hand force. As a result, the gap turns into a clean V-shape about 1/8-inch wide and 1/8-inch deep.
-
This groove gives the fresh sealant enough room to grip both side walls.
-
Next, blow or vacuum all the loose grit out of the groove.
Step 3: Apply Flexible Elastomeric Stucco Sealant
Now fill the open groove with your textured sealant:
-
Cut the plastic tip of your caulk tube at a 45-degree angle. Keep the hole small.
-
Poke the inner foil seal and place the tube into your caulk gun.
-
Next, place the tip right inside the groove.
-
Squeeze the trigger with steady force while pulling the gun along the crack.
-
Fill the crack so the caulk rises slightly past the wall face. Therefore, no hollow air gaps remain inside.
Step 4: Blend and Match Surrounding Stucco Texture
Blending your patch keeps the repair hidden from view:
-
First, scrape the wet sealant flat with your putty knife held low against the wall.
-
Next, wet your coarse sponge with clean water.
-
Then, tap the wet patch softly with the sponge. The sponge pulls up sand grit inside the caulk, which matches the rough wall texture.
-
Feather the wet edges out two inches onto the painted wall so you see no sharp lines.
-
If your home has a heavy trowel texture, add small flat strokes with the tip of your knife.
Step 5: Allow the Stucco Patch to Cure Completely
Give the fresh patch enough time to dry:
-
Most flexible sealants dry to the touch in two hours. However, they need 24 to 48 hours to cure all the way through.
-
Avoid painting the patch too early. Because wet caulk traps moisture under paint, early painting causes ugly paint blisters.
-
In cool coastal towns like Ventura or Oxnard, wait a full 48 hours before you add paint.
Step 6: Prime and Paint with 100% Acrylic Exterior Paint
Finally, protect your work from sun and rain:
-
Put a coat of exterior primer over the patched seam with a small brush. This primer seals the patch so the paint sheen stays flat.
-
Next, let the primer dry for two hours.
-
Then, add two coats of matching house paint. Brush the paint outward so the new color blends into the old wall paint.
Common Mistakes When You Repair Stucco Cracks
Avoid these common slip-ups so your repair stays strong:
-
Using hard cement on settling cracks: Hard cement does not stretch. When your home moves slightly, hard patches crack open right away. Therefore, always use flexible textured caulk.
-
Skipping the V-groove step: Smearing caulk over a raw crack leaves a raised bump that peels off fast. Thus, always carve a groove first.
-
Using smooth bathroom caulk: Indoor silicone cannot hold paint. In addition, its shiny look looks bad on rough stucco walls. For this reason, always buy paintable textured caulk.
-
Painting wet walls: Painting wet stucco traps water under the paint coat. As a result, your fresh paint will bubble and peel off.
Ventura County Climate Tips for Exterior Stucco Maintenance
Local weather calls for regular seasonal home checks:
-
Ventura and Oxnard (Fog and Salt Air): Wet coastal air helps mold grow in shaded wall cracks. Therefore, wash north-facing walls once a year with a hose and mild soap, and seal cracks before winter storms bring driving rain.
-
Camarillo and Thousand Oaks (Hot Sun and Dry Winds): Strong sun and dry fall winds bake exterior wall paint. For this reason, check south and west walls every fall so you can seal fresh heat cracks before winter rains start.
When to Call a Professional to Repair Stucco Cracks
While small cracks are easy DIY jobs, some wall problems need skilled trade help:
-
Cracks wider than 3/8-inch, which point to major foundation settling.
-
Soft or bulging wall sections where plaster has pulled away from the metal wire.
-
Active indoor leaks or white mineral stains running down exterior walls.
If your walls need plaster work, your window trim needs weather seals, or you want a pro to handle your home repair checklist, Paul Franc Handyman Services is ready to help. Proudly serving homeowners, landlords, and commercial spaces throughout Ventura, Oxnard, Camarillo, Thousand Oaks, and surrounding Ventura County communities, we provide dependable, quality home repairs done right the first time. Visit paulfranc.com to request an estimate or schedule your service today.