
Few kitchen sounds cause immediate frustration quite like flipping the wall switch and hearing only a dull, humming buzz from underneath the sink. When a food waste disposer hums without spinning, jams repeatedly, or starts dripping dark wastewater onto your cabinet floor, you need to replace a garbage disposal. According to plumbing standards outlined by the International Association of Plumbing and Mechanical Officials (IAPMO), maintaining secure mechanical disposal seals prevents hidden kitchen leaks that rot subflooring and cabinet bases.
Across Ventura County, garbage disposals endure significant wear due to regional water conditions. Municipal water supplies throughout Ventura, Oxnard, Camarillo, and Thousand Oaks carry noticeable mineral hardness. Dissolved calcium and lime scale bind with food acids inside the grinding chamber, accelerating corrosion on steel shredder impellers and inner motor seals. Over a span of 8 to 12 years, internal seals degrade until water seeps past the motor housing, causing internal electrical faults.
Fortunately, learning how to replace a garbage disposal is an achievable, satisfying DIY project. If you choose a replacement unit from the same manufacturer brand, the existing sink mounting ring usually stays in place, turning this into a clean 90-minute swap. This comprehensive guide walks you through the entire process step-by-step so you can replace a garbage disposal safely and cleanly.
Project Overview: Replacing a Garbage Disposal
-
Skill Level: Intermediate
-
Estimated Time: 1.5 to 2 hours
-
Average DIY Cost: $90 – $220 (for a reliable 1/2 HP or 3/4 HP replacement unit)
-
Estimated DIY Savings: $200 – $350 compared to a dedicated plumbing service call
Tools and Materials Needed to Replace a Garbage Disposal
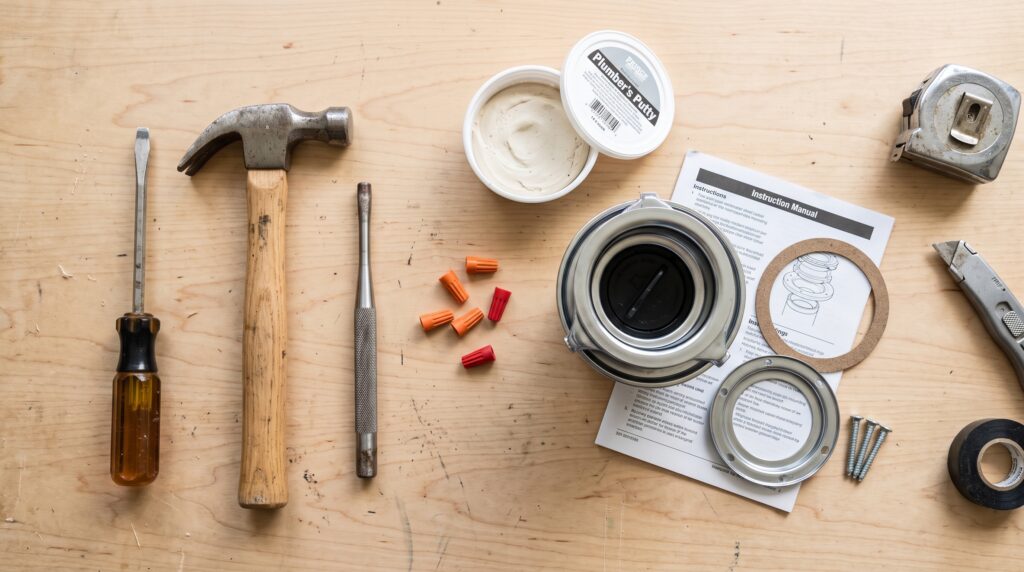
Having your tools arranged neatly inside a shallow plastic bin keeps your under-sink workspace organized.
Essential Tools
-
Non-contact voltage tester: Confirms zero electrical current before handling disposal wiring.
-
Manual #2 Phillips and flathead screwdrivers: For loosening hose clamps and mounting collar screws.
-
Slip-joint pliers (Channel-lock pliers): For loosening PVC drain slip nuts.
-
Hammer and steel punch (or large slotted screwdriver): Essential for removing the dishwasher knockout plug.
-
Small utility bucket and old rags: Catches residual wastewater when disconnecting drain pipes.
-
Flashlight or headlamp: Provides clear hands-free visibility inside dark cabinet corners.
Recommended Materials
-
New garbage disposal unit: Choose a continuous-feed 1/2 HP model for small households or 3/4 HP for heavy family cooking.
-
New disposal electrical power cord kit: Required if your new unit does not come with a pre-attached cord.
-
Twist-on wire nuts and strain relief clamp: Protects electrical conductors from rubbing against metal knockouts.
-
Plumber’s putty: Required only if you replace the upper sink drain flange.
Safety Precautions Before You Replace a Garbage Disposal
Working under a kitchen sink involves both 120-volt electricity and pressurized drain lines. Always follow these safety rules before you replace a garbage disposal:
-
Disconnect electrical power at the breaker panel: Never assume that turning off the wall switch cuts all current. Always switch the kitchen circuit breaker to “OFF” at your main service panel.
-
Verify power disconnection with a tester: Remove the bottom metal electrical cover plate on the old disposal and touch your non-contact tester to the black and white wires to confirm zero voltage.
-
Never place your hands inside the grinding chamber: Always handle the unit by its outer plastic shell or motor housing.
-
Support the heavy motor weight: A typical 3/4 HP garbage disposal weighs between 13 and 18 pounds. Support the bottom of the unit with a small wooden block or car jack so it does not drop abruptly when unlatched from the mounting ring.
How to Know When to Replace a Garbage Disposal
Before purchasing a new appliance, verify that your current unit has reached the end of its functional life:
-
Water dripping from the bottom motor housing: If water leaks from the reset button hole or bottom vents, internal motor seals have ruptured. This condition cannot be repaired with sealant; you must replace a garbage disposal immediately to prevent electrical shorts.
-
A persistent hum that trips the breaker: If resetting the red button and clearing the blades with an Allen hex wrench fails to restore rotation, the motor windings have burned out.
-
Chronic slow grinding and frequent jams: Worn, dull impellers take twice as long to process food scraps, indicating that internal grinding components have degraded.
Step-by-Step Guide: How to Replace a Garbage Disposal
Step 1: Disconnect Power and Water Supply
First, ensure that your work area is completely isolated:
-
Turn off the dedicated kitchen circuit breaker at your main electrical panel.
-
Unplug the disposal power cord from the under-sink outlet. If your unit is hardwired into a metal wall conduit box, use your non-contact tester to confirm that zero voltage enters the junction box before disconnecting wire nuts.
-
Turn off both hot and cold under-sink water shut-off valves as an added precaution against accidental pipe knocks.
Step 2: Detach Plumbing and Remove the Old Disposal
Next, free the disposal unit from your kitchen drain lines:
-
Place your utility bucket and folded towels directly beneath the curved P-trap.
-
Loosen the hose clamp connecting the flexible dishwasher drain line to the disposal inlet nipple, and slide the rubber hose off.
-
Loosen the slip nut holding the black discharge elbow to the kitchen P-trap using slip-joint pliers.
-
Place a small paint can or wooden block underneath the disposal to catch its weight.
-
Insert the tip of a screwdriver or the specialized silver disposal wrench into one of the mounting ring lug loops at the top.
-
Turn the mounting collar counterclockwise roughly 1-1/2 inches. The disposal will disengage from the three mounting pins and drop free. Lower the unit onto your towel and remove it from the cabinet.
Step 3: Knock Out the Dishwasher Drain Plug
This is the single most critical step when you replace a garbage disposal connected to an automatic dishwasher:
-
Examine the small plastic inlet nipple near the top of your new disposal where the dishwasher hose attaches.
-
Inside this nipple sits an internal plastic factory plug that blocks water flow.
-
Place a steel punch or flathead screwdriver against the plug inside the nipple.
-
Strike the end of the punch firmly with a hammer to pop the plastic disc into the grinding chamber.
-
Reach your hand into the top sink opening (or turn the unit upside down) and remove the loose plastic slug. If you forget to remove this plug, your dishwasher will fail to drain, backing dirty water onto your kitchen floor during its next cycle.
Step 4: Wire the New Garbage Disposal
Wiring the unit while it rests on your workbench is far easier than working inside the cabinet:
-
Unscrew the small metal electrical access plate on the bottom of the new disposal.
-
Install a 3/8-inch threaded metal cable clamp (strain relief) into the knockout hole.
-
Feed the three-wire power cord through the clamp.
-
Connect the green ground wire to the green grounding screw on the disposal housing.
-
Twist the white neutral wire from the cord together with the white disposal lead using a wire nut.
-
Twist the black hot wire from the cord together with the black disposal lead using a wire nut.
-
Wrap each wire nut with electrical tape, fold the conductors into the compartment, reinstall the metal cover plate, and tighten the strain relief clamp screws.
Step 5: Mount and Lock the New Disposal in Place
If your new disposal shares the same brand as the old one (such as InSinkErator), you can reuse the existing sink flange and mounting ring:
-
Lift the new disposal into position beneath the sink mounting assembly.
-
Align the three mounting tabs on the disposal collar with the ramp tracks on the sink mounting ring.
-
Turn the lower mounting ring clockwise by hand to start engaging the tabs onto the ramps.
-
Insert your screwdriver horizontally through one of the metal ring lugs.
-
Pull the screwdriver clockwise with firm leverage until the mounting ring clicks securely past the locking ridge. Both tabs must lock fully into the safety stops to prevent the disposal from shaking loose under motor vibration.
Step 6: Reconnect Plumbing and Test for Leaks
Finally, reassemble your drain connections and test the appliance:
-
Install the rubber gasket onto the new disposal discharge outlet, attach the black elbow pipe, and tighten the metal retaining flange bolts evenly.
-
Connect the discharge tube to the sink P-trap and hand-tighten the slip nut. Add a quarter-turn with pliers.
-
Reattach the flexible dishwasher hose onto the upper inlet nipple and tighten the hose clamp firmly.
-
Plug the disposal cord back into the wall outlet and switch on the circuit breaker at the electrical panel.
-
Run cold water into the sink for two minutes. Run a dry paper towel around all three plumbing joints beneath the sink. If the paper towel stays dry, switch on the disposal to verify quiet, vibration-free operation.
Common Mistakes When You Replace a Garbage Disposal
Avoid these frequent DIY missteps to ensure that your new kitchen appliance operates reliably:
-
Forgetting the dishwasher knockout plug: Leaving the factory plastic plug in place prevents the dishwasher from discharging, causing standing wastewater and kitchen flooding. Always knock out and remove the plug before mounting.
-
Running hot water while grinding food: Hot water melts food fats and grease, allowing them to coat internal drain pipes. Always run strong cold water while operating the disposal so fats solidify and pass cleanly through the P-trap.
-
Overtightening PVC slip nuts: Excessive force with heavy channel-lock pliers cracks plastic slip nuts. Hand-tighten nuts firmly, then apply only a gentle quarter-turn with pliers.
-
Failing to engage the mounting ring locks: If the mounting ring is not turned completely past the locking ridges, the motor will eventually twist loose and drop during high-torque startup.
Ventura County Hard Water and Disposal Maintenance Tips
Our regional water conditions require proactive kitchen maintenance habits:
-
Ventura and Oxnard (Combating Mineral Scaling): Hard mineral water promotes white scale buildup on internal grinding impellers. Once a month, drop two trays of ice cubes and a cup of coarse rock salt into the disposal, then run the unit with cold water. The ice cleans the grinding teeth and knocks away mineral crusting.
-
Camarillo and Thousand Oaks (Managing Organic Odors): High summer temperatures in inland valleys cause food residue inside drain lines to sour quickly. Grind fresh lemon peels mixed with baking soda once a week to deodorize the chamber naturally without introducing caustic chemicals that degrade rubber gaskets.
When to Call a Professional to Replace a Garbage Disposal
While standard disposer replacements are straightforward for handy homeowners, certain kitchen configurations require professional tradesmanship:
-
Corroded sink drain openings where the stainless steel sink has thinned, requiring specialized sealing or sink replacement.
-
Hardwired electrical configurations without an existing under-sink outlet, requiring a new dedicated GFCI circuit.
-
Complex dual-basin sink plumbing that requires custom PVC pipe rerouting to accommodate larger high-horsepower motor bodies.
If your kitchen plumbing needs reconfiguration, your electrical box requires upgrading, or you prefer a professional to handle your home maintenance checklist, Paul Franc Handyman Services is ready to assist. Proudly serving homeowners, landlords, and commercial spaces throughout Ventura, Oxnard, Camarillo, Thousand Oaks, and surrounding Ventura County communities, we provide dependable, quality home repairs done right the first time. Visit paulfranc.com to request an estimate or schedule your service today.