That sharp, rhythmic chirp echoing down your hallway at three in the morning is a sound every homeowner dreads. Most people assume a chirping alarm simply needs a fresh 9-volt battery. However, if you pop in a brand-new battery and the chirping continues, your alarm has reached the end of its safe working life. When you learn how to replace a smoke detector, you restore vital peace of mind and keep your family safe. According to fire safety guidelines from the National Fire Protection Association (NFPA), all residential smoke alarms must be replaced every 10 years from their date of manufacture. After a decade of service, internal dust and sensor wear make old alarms unreliable.
In Ventura County, local weather and seasonal conditions put extra strain on ceiling alarms. For example, coastal homes in Ventura and Oxnard face damp marine fog and salty air. Over time, that humidity corrodes internal battery terminals and triggers false nuisance alarms. Meanwhile, inland valleys like Camarillo and Thousand Oaks deal with gusty Santa Ana winds and wildfire smoke risks. Fine windblown dust settles inside old alarm chambers, reducing sensor sensitivity right when your home needs fast detection most.
Fortunately, learning how to replace a smoke detector is a quick, beginner-friendly project. Whether your home uses battery-powered units or hardwired interconnected alarms, you can swap an old unit in under 20 minutes. This complete guide shows you how to replace a smoke detector safely and accurately.
Project Overview: Replacing a Smoke Detector
-
Skill Level: Beginner
-
Estimated Time: 15 to 25 minutes per alarm
-
Average DIY Cost: $25 – $55 per dual-sensor or combination smoke/CO alarm
-
Estimated DIY Savings: $100 – $175 compared to an electrical service call
Tools and Materials Needed to Replace a Smoke Detector
Gathering your tools ahead of time keeps ladder work fast and safe.
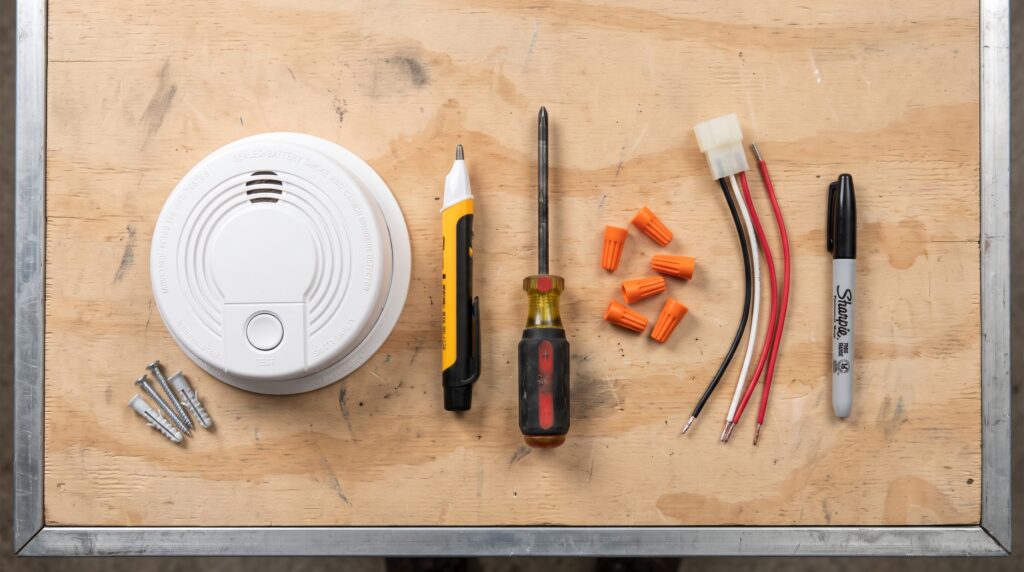
Essential Tools
-
Sturdy 6-foot step ladder: Gives you safe, comfortable reach to ceiling height without stretching.
-
Manual #2 Phillips screwdriver: Tightens mounting plate screws gently without cracking plastic brackets.
-
Non-contact voltage tester: Confirms zero electrical current before touching hardwired ceiling plugs.
-
Wire strippers and cutters (for hardwired units): Needed only if swapping incompatible wire harnesses.
-
Permanent marker: Writes the installation date clearly on the back or side of the new alarm.
-
Vacuum cleaner with soft brush attachment: Clears cobwebs and dust from the ceiling area.
Recommended Materials
-
New UL-listed smoke alarm (or combination smoke and carbon monoxide alarm): Choose photoelectric or dual-sensor models for fewer cooking nuisance alarms.
-
Adapter wire harness (for hardwired alarms): Many brands sell quick-connect plugs that snap into existing ceiling harnesses without rewiring.
-
Drywall anchors and mounting screws: Included in the box if your new mounting bracket uses different hole spacing.
-
Small wire nuts (if replacing the wire harness): Connects bare copper leads securely inside the ceiling box.
Safety Precautions Before You Replace a Smoke Detector
Working on ceiling alarms and electrical circuits calls for basic safety habits:
-
Always shut off power for hardwired alarms: If your alarms connect to house wiring, flip the dedicated circuit breaker to “OFF” at your main electrical panel before removing the old unit.
-
Test wires with a voltage tester: Confirm your non-contact voltage tester works on a live wall outlet first. Next, test the ceiling wires inside the box to verify zero voltage before touching copper.
-
Never paint over a smoke detector: Paint seals the sensor vents shut, blocking smoke from reaching the detection chamber.
-
Use a sturdy step ladder: Never stand on dining chairs or wobbly stools to reach ceiling alarms. Set your ladder flat on solid flooring.
Choose the Right Replacement Smoke Detector
Picking the proper alarm ensures reliable protection and meets safety standards from the U.S. Fire Administration (USFA):
-
10-Year Sealed Lithium Battery Alarms: Ideal for homes without hardwired ceiling boxes. These units run for a full decade without annual battery swaps, which satisfies California state safety rules for battery-only alarms.
-
Hardwired Alarms with Battery Backup: Found in most modern Ventura County homes. These alarms draw main power from house wiring and link together so when one alarm sounds, every alarm in the house rings together.
-
Photoelectric vs. Dual-Sensor Alarms: Photoelectric sensors excel at detecting slow, smoldering fires while ignoring light kitchen cooking steam. Dual-sensor models combine both photoelectric and ionization sensors for broad protection.
Step-by-Step Guide: How to Replace a Smoke Detector
Step 1: Check the Manufacture Date and Power Type
First, inspect your existing alarm before buying a replacement:
-
Climb your step ladder and twist the old smoke alarm body counterclockwise to release it from the ceiling bracket.
-
Look at the back label to find the Date of Manufacture. If the date is more than 10 years old (or missing), replace the unit right away.
-
Check whether the alarm has a 3-wire power plug attached to the back. If it connects to house wires, you have a hardwired alarm and must buy a hardwired replacement with battery backup.
-
If the unit has no wires, you have a battery-powered alarm. Choose a 10-year sealed lithium battery model.
Step 2: Turn Off Power at the Breaker Panel
If you are replacing a hardwired unit, isolate the power circuit first:
-
Head to your main electrical panel and flip the breaker labeled “Smoke Alarms” or the corresponding bedroom lighting circuit to “OFF.”
-
Check the small green or red LED indicator light on your old ceiling alarm. When the power light goes dark, the main AC current is off.
-
Unplug the plastic wire harness from the back of the old alarm by squeezing the side locking tabs.
Step 3: Swap the Mounting Bracket and Wire Harness
If you buy the same brand as your old unit (such as Kidde or First Alert), the old bracket and wire harness may snap right onto the new alarm. However, if you switch brands or update an older plug style, follow these steps:
-
Unscrew the two screws holding the old plastic mounting plate to the ceiling electrical box.
-
Touch your non-contact voltage tester to the ceiling wires to verify zero power.
-
Untwist the wire nuts connecting the old harness to the house wires (black to black, white to white, and red or orange interconnect wire to the matching interconnect lead).
-
Strip 1/2-inch of fresh copper if needed, then twist the new wire harness leads to the matching house wires using fresh wire nuts. (Black is hot, white is neutral, and the third colored wire is the interconnect line).
-
Tuck the spliced wires neatly back inside the ceiling junction box.
-
Attach the new plastic mounting bracket over the electrical box using your manual screwdriver.
Step 4: Activate the Backup Battery and Write the Date
Before locking the alarm onto the ceiling, prep the new unit:
-
Use a permanent marker to write today’s month and year on the side or back label of the new detector. This helps you track the 10-year replacement window easily.
-
Pull the plastic battery activation tab from the side of the unit (or insert the fresh backup battery provided in the package).
-
You should hear a quick startup chirp confirming the battery works properly.
Step 5: Snap the New Smoke Detector into Place
Now secure the detector to your ceiling:
-
Plug the white plastic ceiling wire harness firmly into the back port of the new smoke detector until it clicks.
-
Push any slack wire gently up into the ceiling box opening.
-
Align the alignment notches on the back of the detector with the mounting tabs on the ceiling bracket.
-
Press upward gently and twist the detector clockwise until it locks tightly into place.
Step 6: Restore Power and Test All Interconnected Alarms
Finally, test your upgraded alarm system:
-
Return to your electrical panel and flip the circuit breaker back to “ON.”
-
Look up at the new alarm. The small green power light should glow steadily, showing that AC power is flowing.
-
Press and hold the “TEST” button on the new alarm for five seconds.
-
The unit should sound three loud beeps, pause, and repeat. If your alarms are hardwired together, listen closely to verify that every other interconnected alarm throughout the house sounds in unison.
Common Mistakes When You Replace a Smoke Detector
Avoid these frequent DIY slip-ups to keep your home fire protection reliable:
-
Mixing incompatible brands on hardwired systems: Different brands use different voltage signals on their red interconnect wires. If you connect two mismatched brands together, they may trigger false alarms or fail to ring together. Always stick with one brand throughout your home.
-
Mounting too close to kitchens or bathrooms: Steam from showers and light cooking smoke trigger false nuisance alarms. Keep smoke detectors at least 10 feet away from stove ranges and 3 feet away from bathroom doors.
-
Skipping the annual cleanout: Dust and tiny cobwebs inside sensor chambers cause phantom 3:00 AM chirps. Vacuum around your alarm vents gently twice a year using a soft brush attachment.
-
Leaving the old plastic bracket in place with a new brand: Even if a new unit seems to fit an old bracket, small tab differences can leave the alarm hanging loosely. Always install the matching bracket included in the box.
Ventura County Climate Tips for Smoke Alarm Reliability
Local seasonal factors call for simple, steady maintenance:
-
Ventura and Oxnard (Coastal Fog and Salt Air): Moist ocean breezes increase indoor humidity, which can slowly oxidize 9-volt battery clips and trigger nuisance chirps. Switching to sealed 10-year lithium units or hardwired alarms with sealed lithium backups prevents corroded terminals.
-
Camarillo and Thousand Oaks (Managing Santa Ana Wind Dust): Strong autumn winds push fine outdoor dust through open windows and attic vents directly into hallway ceiling alarms. Vacuum your smoke detectors every fall right after wind advisories pass to keep sensor optics clear.
When to Call a Professional to Replace a Smoke Detector
While swapping an existing alarm is an easy DIY task, some home setups need skilled trade help:
-
High vaulted living room ceilings or steep two-story stairwells that require specialized tall ladders or scaffolding.
-
Adding brand-new hardwired interconnected circuits in older homes where only standalone battery units currently exist.
-
Troubleshooting mysterious phantom chirping or tripped breakers caused by damaged wiring inside ceiling junction boxes.
If your ceilings are out of safe ladder reach, your hardwired system needs troubleshooting, or you want a pro to handle your home safety checklist, Paul Franc Handyman Services is ready to assist. Proudly serving homeowners, landlords, and commercial spaces throughout Ventura, Oxnard, Camarillo, Thousand Oaks, and surrounding Ventura County communities, we provide dependable, quality home repairs done right the first time. Visit paulfranc.com to request an estimate or schedule your service today.